Sunday, April 3, 2011

Coburg Food Swap

I went to my first Coburg Food Swap yesterday. What a great way to meet the locals and exchange your excess harvest for items not in your own garden!

I've been to two other food swaps, one we have as part of the Permaculture Inner North monthly meeting, the other was a once off organised at my work by the Permaculture Community of Practice. Most of my produce is at the country plot and not in Melbourne, so I wasn't sure if I had enough to swap. Then I read an article in Earth Garden magazine, where woman saw the food swap near the Fitzroy Pool and just HAD to join it. She figured a few bunches of herbs in the garden should do the trick, and it did.

So I headed out to the backyard which has a lovely rosemary bush and snipped off a dozen sprigs. I thought everyone has rosemary, don't they? Well, if they did, why is it sold in supermarkets? From the potato harvest, I had a few of the purple Saphires in the cupboard so grabbed some of them, too.

I headed down to Pepper Tree Community Nursery, on the corner of Bell and Sydney Rd. It's part of Kildonan Uniting Care (Uniting Church).  The Coburg Food Swap is held from 10am-midday on the first Saturday of every month at 512 Sydney Rd, Coburg (corner Sydney Rd and Bell St).

With my little offering I managed to meet new people and was offered seeds, recipes, cooking tips and biscuits as well as a whole host of fresh produce. I went at the end of the swap, and as people have the tendency to be generous but not take much, I walked away with a full bag, including:
  • apples
  • pears
  • garlic chives
  • two types of chilli
  • capsicum
  • okra
  • warrigal greens (NZ spinach)
  • rhubarb
  • oregano
  • basil (needed some help identifying it, I think it was basil mint)
  • tiny, unusual eggplant

Amazing, no? My recommendation: go to a food swap or start one up. CERES lists a few. Do you know of a good list of food swaps in Australia or Melbourne?

We've all got some excess produce we would prefer to exchange for what we don't have. And don't be shy taking a decent amount of food home with you as you don't want the organiser to be stuck with too much.

Friday, March 18, 2011

Autumn Harvest Season

Potato Harvest
It's so satisfying when the time comes to harvest. I grew potatoes for the first time and the nursery assistant quickly figured I would be the type to buy some heirloom potatoes. So I grew Saphire (large potato, purple skin and flesh), Cranberry Red (pink skin and pale pink flesh) and Kipfler (smaller, elongated) and a good all rounder, Sebago.

I enjoyed the Saphire boiled, then covered with heated butter, sage and salt and pepper. I thought yum! My mum roasted them and didn't like it.

Potatoes I planted: Saphire, Kipfler, Cranberry Red and Sebago

To plant a potato, one piece should have about 3 eyes on it. So you can cut one potato into many as long as you have about 3 eyes per piece. They grew very well although I should have mounded and mulched more for a greater harvest. Potatoes grow up not down, so if you keep mounding the soil more will grow. Plus it will reduce the likelihood a potato will see the sunlight and things then going wrong. I thought I got a good harvest. Digging them up was fun: I hadn't noticed so many earthworms when I planted them but now there are heaps.

Apparently if you mulch well, you can "bandicoot": dig up a little baby potato close to the surface. My friend and I read this in Jackie French's book, so we went out to my friend's potato plot in a bathtub and she quickly found a potato under the mulch.

I've given away the other potatoes so far in a food swap at work or to my parents, so haven't tried them all yet. But I have some waiting for me in a cool, dark spot of the house. Best to store with dirt on them to lengthen their life.

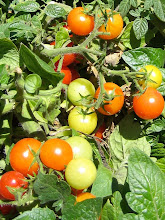
I've also had a great harvest (when I'm at the house, which hasn't been much) of tomatoes: Silvery Fir Tree (red, slightly ribbed) had about 100 tomatoes per plant, Yellow Cherry Cocktail was prolific with a long fruiting time and Yellow Pear is also going well. Then I have red Tommy Toe, orange Tigerella and red, ribbed Rouge de Marmande. I'm not sure the name of the other yellow tomato, similar size to Tommy Toe. I'm still waiting on the green Zebra (a mystery as I don't know which ones these are amongst the green tomatoes), Grosse Lisse and Black Russian to ripen.

I have made my own tomato relish out of 3kg of (mainly) Silvery Fir Tree tomato. Tomorrow is my 4th Annual National Tomato Sauce Making Day with friends (yes, I made this title up) and then on Sunday I'll do it again with Permaculture Inner North. Looking forward to it! Hard to get tomatoes this year: lots of rain and humidity=not many good tomatoes in Victoria. But I still managed to get my $20 for 20kg box. I don't have enough cooking tomatoes to make my own tomato sauce. They are more for salad.

Monday, February 14, 2011

Installing Irrigation System

Zucchini with flower: good for stuffing and frying

Watering my plants around the house takes me an hour. I like to give them a good soak, as they don't get watered every day. The house is on the farm, at the corner of the farm is the plot but I haven't built my vegie beds there yet. The water is from a spring that sources water from the mountain behind the house. I'm only at the house for half a week, so getting someone else to water is a big issue in summer.

I decided the most efficient thing to do with my time and the time of everyone else, was to install an irrigation system. I'd never installed an irrigation system before. I treated this as my "pilot" for what I will do on the plot.

As I didn't know anything, I had to learn. I first went down to the local rural supplies shop (W.B Hunter) and told them I was wanting to install an irrigation system around the house. I asked what this would involve. They pointed out the polypipe (they said I'd need the 13mm for the drippers and the 19mm to transport the water over a longer area with minimal friction). They also gave an introductory run down on the dozens of pieces of plastic that you attach to an irrigation system. From the first visit, I walked away with a measuring tape.

I then headed over to the local library and borrowed books on waterwise gardening. I found "Waterwise Gardening" by Kevin Walsh very helpful in explaing what irrigation parts I needed. It also explains how to calculate your water flow and then convert this to the number of drippers and metres of pipe the tap can service.

I measured the water flow, the length of each bed and sketched my plan. The area needed to be broken into subareas for watering, as it was too large for one tap to handle at one time. Installing valves was the solution. Then I came up with a list of items I needed to purchase. Once this was done, I was back to the shop to make my purchase.

There are a number of drippers and sprays. The drippers are often 4 litres per hour, while the sprays are much more than this (Kevin quoted a 246 litres per hour for a garden spray). The author explained that the drippers are way more effective, and you normally lay the pipe with drippers under the mulch. This should soak the soil, as compared to the garden sprays that wet the leaves and on top of the mulch but don't easily penetrate it (and float off on the wind).

The explanation on why the sprays weren't as efficient and the micro sprays even worse, held me in good stead. When I returned to the shop (Permewans hardware store this time, as rural supplies store keep rural hours of shutting at midday on Saturday), the attendant offered me all the drippers and spray types (360 degree and 180 degree). I was more interested in the drippers, so I asked why would I get the spray types over the drippers. She responded that the sprays were way more popular in sales than the drippers. Not so much a rational for why the sprays performed better, but a view based on sales volume. At least I knew why I should pick the dripper: efficiency. I took a sample of each type, anyway.

Task: turn this mind-boggling pile of plastic into a functioning irrigation system

At home, constructing the system took quite a while. I think if I had stronger muscles it could have been easier. For those with a bit more muscle, they can push each connector into the pipe easily, or completely close the ratchet clip that goes around each pipe end (I can't get the last tooth clicked over without help of some pliers). Even pushing the contraption to make the holes in the pipe and then pushing the drippers in was more effort than I'd imagined. But it is all achievable, even for a pint-sized person whose office job has not prepared her muscles well for physical labour.

The fun part was working out how to get the pipe attached to the tap. It was like playing Lego: which piece of plastic should go where. But I got there with:
  • tap
  • 2 hour manual timer (in hindsight, I'll upgrade to one I can set while I'm away)
  • two way diverter (so I can still use the tap without unhooking the irrigation system)
  • hose connector
  • pipe
  • elbow join (so system goes from vertical to horizontal)
  • pipe
  • filter
  • pipe
  • t-connector
  • pipe either side
  • valve either side that can isolate the water flow
Phew!

I was pretty impressed with my first effort at installing an irrigation system. And it works! So now when I go and water the garden, I turn the dial on for two hours and I'm free to harvest produce or do a bit of weeding while I'm out there.

 Irrigation system complete

Sunday, January 23, 2011

A homegrown meal

Garden harvest
 
Mary, Mary, quite contrary how does your garden grow?

Quite well, at the moment. It's so lovely to see my zucchini plants and 25+ tomatoes taking off. I had a lovely meal last night, mainly harvested from the garden. I made a couscous salad that included beetroot - chioggia (has red and white concentric circles), lettuce - cos purple freckle, mint, purple sage, a squeeze of lemon and the first tomato - a yellow cherry tomato! Very happy with my harvest, which I dressed with olive oil and balsamic vinegar, plus a chévre (goat cheese) from nearby Milawa Cheese Factory.

I have either grown my vegetables and herbs from seed or from cuttings from friends and the lemon tree was here way before me.

Comparing paying for seeds to seedlings is huge. If they don't all germinate, oh well, you haven't really lost much money. Just a few cents. So just give it a go. Not all the beetroot germinated but that's ok. So if you want to penny pinch, buy a packet of seeds and try it out. Go crazy with all the different varieties available that won't be sold as seedlings.

You'll end up with too many seeds than you can use in a year, so share amongst your friends. It's a bit of an insurance policy, too. The germination rate of the seeds will decline over time, so if a few of you are growing a variety then if one of you should run out, someone else will have them. I shared my seed box with my workmates. It did a lap of the office before it got back to me. It made me happy that others were going to use them.

About six or so beetroot grew, but I gave most to my Mum so the remaining one in the garden is for seed harvesting. Try and buy the seeds once, save them from the next harvest so you never have to buy again. What an investment! Apparently, the chioggia beetroot was grown as a staple in 1583 in Venetian cuisine!

 Beetroot Chioggia

Monday, December 27, 2010

Native Grass

 Kangaroo Grass
Before this year, I never thought native grasses still existed on farmland. I'd grown up with the idea that you sow seed for "improved pasture". Clovers, ryegrass, phalaris and such. I thought with the high impact of stock and tillage native grasses would have been banished to state forests.

I was very pleased when my friend identified a few native grasses on my plot earlier this year. I'm new to identifying them, but am excited they exist. I have since discovered that it isn't so bizarre to have native grasses on farms and with careful management, such as holistic management which uses stock for an intense period and then rest, you can have a diverse array of native grasses. As they are native to the area, they are a somewhat more reliable pasture plus don't cost you to establish.

I knew one corner of the cleared area of my plot had native grass. The other day I noticed a second patch of Kangaroo Grass (Themeda triandra). It has a lovely red this time of year (summer) and has become a more rusty red since I took this photo.

The other I have noticed is Weeping Grass (Microleana stipoides).

Weeping Grass

In December there was a big flood in the King Valley: bigger than in September. The lower parts of my plot were flooded. The water from the road also cut across the plot, flattening the very tall phalaris so I could easily see its path. Principle One in permaculture is Observe and Interact. This was an excellent way to observe!

In my permaculture design of the plot, I had thought the lower area may be prone to flooding so have factored this in. Now it has been confirmed. The trees I had planted were higher up on the slope, so out of harm's way.

The flood also did a fantastic job pushing a lot of blackberry out of the way. If I can get stock in to knock it around some more, I may maintain good access for me to walk to the creek on the north side. The flood dumped so much sand around the creek, a potential new resource for me.

The Black Locust (Robinia psuedoacacia) forest creates a lovely light. It is a welcome retreat from the scorching summer heat (up to 40 degrees) that is sure to come in the next couple of months.
Black locust

Monday, December 13, 2010

Joel Salatin Workshop

Free range pigs

Farming really does pay. Just ask Joel Salatin, of Food Inc fame and owner of Polyface Farm. Farming can support a family plus keep on supporting additional family members. All this while farming "beyond organic" rather than the current industrial agriculture model. How this all works, the nuts and bolts of Polyface Farm, is what I was priveleged to hear about at the two day workshop on Local Farms and Community by Joel Salatin. The last RegenAg workshop for 2010 (can't wait until the 2011 series, despite the FarmReady budget running out for this financial year).

Joel is a very charasmatic farmer and a great communicator from the USA. His farm focuses on growing pasture. His family have taken a degraded landscape that had lost significant amount of topsoil and turned it into a lush farm supporting (or supported by) various animals. The animals are allowed to express their natural behaviour which in turn regenerates the landscape. For example, birds in the wild tend to follow herds and thereby reduce parasites. Hence, the chickens follow the cattle around the paddock on rotational grazing, scratching through cow pats and eating bugs. Pigs love rooting things up, so the pigs turn dropped hay, cow manure and sawdust into compost while looking for the corn that has been sprinkled through it in layers over the very few weeks the cows are fed hay in the shed.

On the first day, Joel took us through the various elements of Polyface Farm:
  • Salad bar beef
  • Pasturised poultry (chicken eggs and meat, turkey)
  • Pigaerator pork
  • Forage-based rabbit
  • Forestry
One of the past interns has recently begun a horticulture enterprise, so it will be interesting to see how that progresses.

Integrate rather segregate is one of the permaculture principles that Joel is excelling at. It has really made me think about including a substantial pasturised poultry enterprise at my plot because a) animals offer such an invaluable environmental service in fertilising and pest control and b) there is money in it.

The second day was on marketing and who is going to do the work. Joel's focus is on selling direct and local. This is all about creating local jobs. Selling direct also means the farmer gets a good price for the produce (I have been told five to one is the common ratio between retail price and the price the farmer gets). Hence the oft quoted line "there's no money in farming", which hardly entices the next generation to keep on the farm. Plus so many farmers are having to supplement their income by working off farm.

I was impressed by the Metropolitan Buying Clubs. Similar to a Community Supported Agriculture scheme, but with more flexibility. Orders are delivered to various hubs eight times a year. Each hub has a hostess who simply provide their house as a drop point and they just need to make sure a minimum order level is acheived across the members. Polyface has increased the number of products they offer, sourcing extra items from like minded farmers at the price the farmer sets. I'll ponder if I can use this model for my business, rather than a set box per week (though it will be different as I will mainly have fresh vegetables rather than frozen meat).

Finally, Joel touched on an aspect close to his heart: including, and creating jobs for, his family. This means being creative in devising new enterprises where each person in the family and their spouse has a role that allows them to express their strengths. The Salatin family have also opened up their farm to interns and apprentices. Leasing rather than buying farms was advocated as an economical way to commence farming.

Planning for succession was an important topic many in the audience had not yet fully dealt with. Nor has my family. The moral of the story: better to find out sooner what will happen with the farm than when you are 50 years old.

I left the workshop optimistic that food grown organically and sold locally was both possible and profitable. The title of Joel's book rings in my ears as a mantra "You Can Farm".

Rabbit Tractor

Friday, November 5, 2010

Biofertile Farms


Paul Taylor and the compost brewer in action

Go to the shed, not the shop. That was the motto for the Biofertile Farms workshop with Paul Taylor and Eugenio Gras. This was the second in the RegenAg series in September.

Throughout the three day workshop we had indoor, theoretical work and then two days outside actually making the compost tea and biofertiliser. An excellent way to do it.

Paul and Eugenio explained how all the agricultural inputs common today (like synthetic fertiliser) actually degrade soil health, and then the common suggested solution is more inputs (like herbicide, fungicide, insecticide) that further degrade soil health. Synthetic fertiliser is typically NPK (Nitrogen, Phosphorous and Potassium), in a medium that is mainly salt so that it is soluble. But plants have two different types of roots: tap roots and feeder roots. Tap roots supply water to the plant and the fine feeder roots feed nutrients to the plant. However, the soluble synthetic fertiliser means that whenever the plant drinks, it takes up the nutrients and the salt. This is not what creates a healthy, robust plant. At the same time, soil microbes don’t like to live in the NPK environment.

Why are microbes important? They play a niche role with the plant’s feeder roots. They take nutrients that exist in the soil and exchange these with the plants for food for themselves. So if you want to access the nutrients that exist in the soil, create an environment that favours microbes.

Healthy soil, healthy plants, healthy people. And healthy soil means living soil with an abundance of microbes.

Paul Taylor made compost tea: brewing up liquid for a day that took a good number of microbes from compost and multiplied the microbes to an unbelievable extent. This is then sprayed onto the soil or as a foliar spray. It adds back in the microbes the environment needs to regain health. It was a simple process, but you do need a special, good quality air pump. An asset that would be a great one for a community group or a group of farmers.

Eugenio with the Bio-fertilser that is ready to ferment

Eugenio Gras made three concoctions that are good substitutes for the commercial chemical fertilisers. Very low cost, simple process that small campesinos to large farmers can make. These concoctions are all about getting off the roundabout of all the chemical fertilisers, herbicides, insecticides etc, etc. Instead, the concoctions are both cheap and improve soil health.

The three concoctions Eugenio made were:

  • · Bio-fertiliser
  • · Lime sulphur
  • · Soluble Phosphorous

It may seem a bit difficult, but as someone said: the hardest part in making the bio-fertiliser is following the cow around waiting for her to shit. Yes, you need the fresh stuff, then ferment it.

Other ingredients were animal bones, burnt then pulverised to dust. Also quite simple.

The last of the RegenAg series for this year (but hopefully not forever) is with Joel Salatin, of Food Inc fame. I can’t wait to hear how he runs his very diverse farm, focusing on selling directly to the local community.

We are the ones we have been waiting for - Hopi Indians