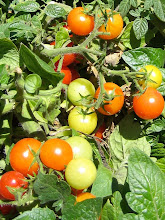
Zucchini with flower: good for stuffing and frying
Watering my plants around the house takes me an hour. I like to give them a good soak, as they don't get watered every day. The house is on the farm, at the corner of the farm is the plot but I haven't built my vegie beds there yet. The water is from a spring that sources water from the mountain behind the house. I'm only at the house for half a week, so getting someone else to water is a big issue in summer.
I decided the most efficient thing to do with my time and the time of everyone else, was to install an irrigation system. I'd never installed an irrigation system before. I treated this as my "pilot" for what I will do on the plot.
As I didn't know anything, I had to learn. I first went down to the local rural supplies shop (W.B Hunter) and told them I was wanting to install an irrigation system around the house. I asked what this would involve. They pointed out the polypipe (they said I'd need the 13mm for the drippers and the 19mm to transport the water over a longer area with minimal friction). They also gave an introductory run down on the dozens of pieces of plastic that you attach to an irrigation system. From the first visit, I walked away with a measuring tape.
I then headed over to the local library and borrowed books on waterwise gardening. I found "Waterwise Gardening" by Kevin Walsh very helpful in explaing what irrigation parts I needed. It also explains how to calculate your water flow and then convert this to the number of drippers and metres of pipe the tap can service.
I measured the water flow, the length of each bed and sketched my plan. The area needed to be broken into subareas for watering, as it was too large for one tap to handle at one time. Installing valves was the solution. Then I came up with a list of items I needed to purchase. Once this was done, I was back to the shop to make my purchase.
There are a number of drippers and sprays. The drippers are often 4 litres per hour, while the sprays are much more than this (Kevin quoted a 246 litres per hour for a garden spray). The author explained that the drippers are way more effective, and you normally lay the pipe with drippers under the mulch. This should soak the soil, as compared to the garden sprays that wet the leaves and on top of the mulch but don't easily penetrate it (and float off on the wind).
The explanation on why the sprays weren't as efficient and the micro sprays even worse, held me in good stead. When I returned to the shop (Permewans hardware store this time, as rural supplies store keep rural hours of shutting at midday on Saturday), the attendant offered me all the drippers and spray types (360 degree and 180 degree). I was more interested in the drippers, so I asked why would I get the spray types over the drippers. She responded that the sprays were way more popular in sales than the drippers. Not so much a rational for why the sprays performed better, but a view based on sales volume. At least I knew why I should pick the dripper: efficiency. I took a sample of each type, anyway.
Task: turn this mind-boggling pile of plastic into a functioning irrigation system
At home, constructing the system took quite a while. I think if I had stronger muscles it could have been easier. For those with a bit more muscle, they can push each connector into the pipe easily, or completely close the ratchet clip that goes around each pipe end (I can't get the last tooth clicked over without help of some pliers). Even pushing the contraption to make the holes in the pipe and then pushing the drippers in was more effort than I'd imagined. But it is all achievable, even for a pint-sized person whose office job has not prepared her muscles well for physical labour.
The fun part was working out how to get the pipe attached to the tap. It was like playing Lego: which piece of plastic should go where. But I got there with:
- tap
- 2 hour manual timer (in hindsight, I'll upgrade to one I can set while I'm away)
- two way diverter (so I can still use the tap without unhooking the irrigation system)
- hose connector
- pipe
- elbow join (so system goes from vertical to horizontal)
- pipe
- filter
- pipe
- t-connector
- pipe either side
- valve either side that can isolate the water flow
I was pretty impressed with my first effort at installing an irrigation system. And it works! So now when I go and water the garden, I turn the dial on for two hours and I'm free to harvest produce or do a bit of weeding while I'm out there.
Irrigation system complete


